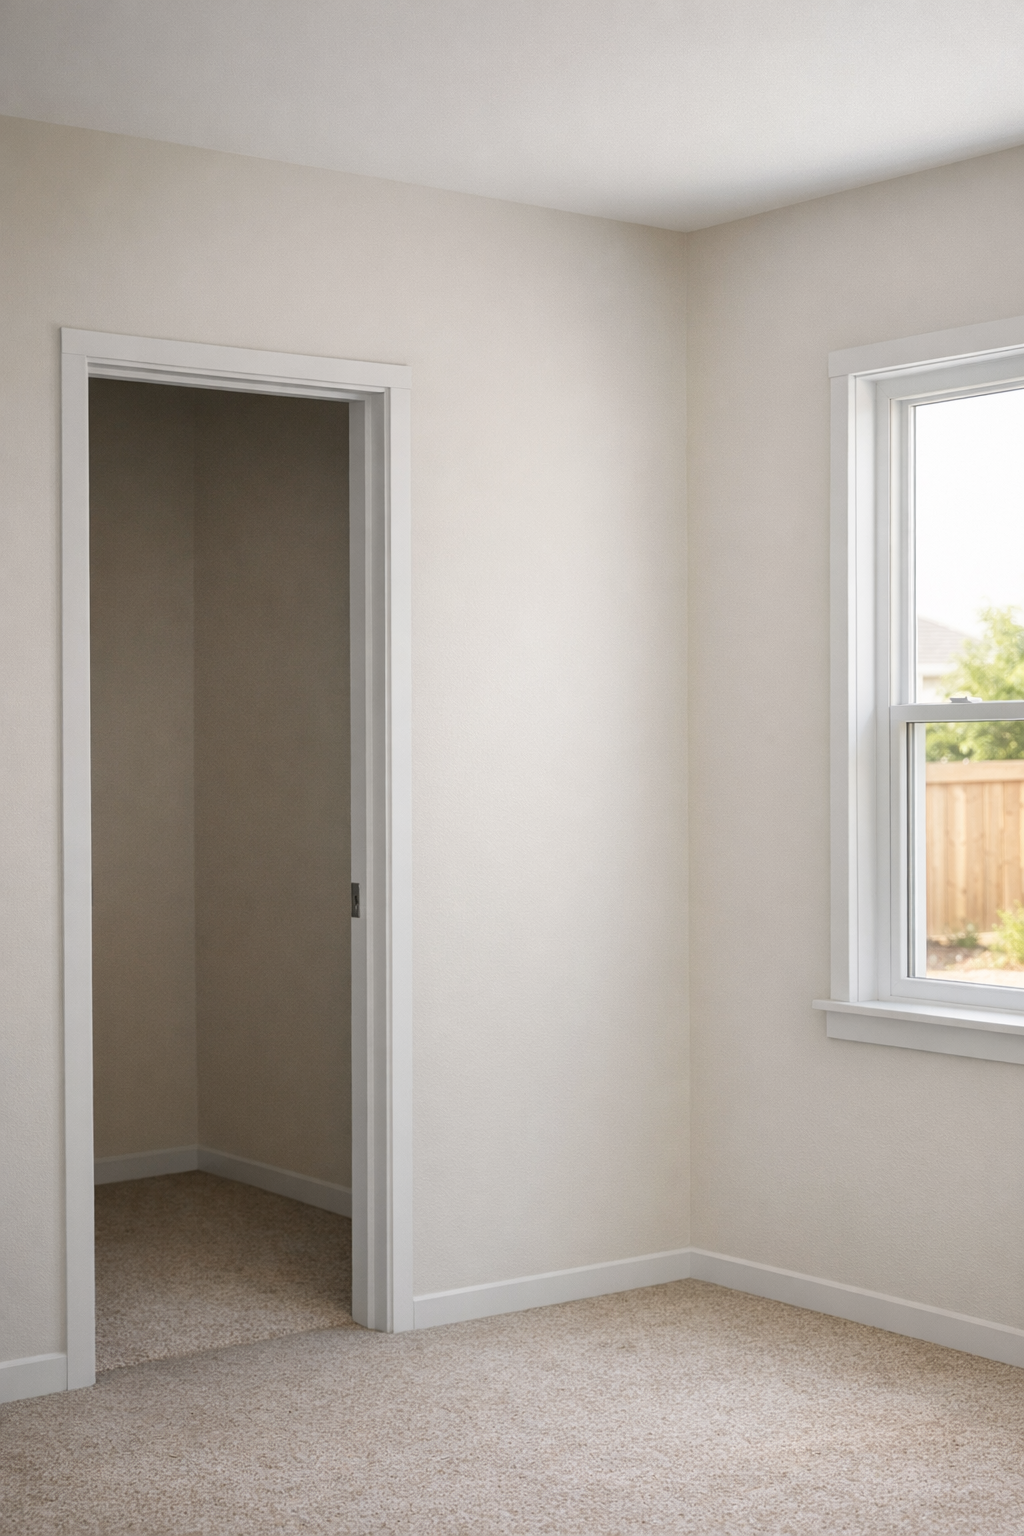
In many builder-grade homes, the rooms are not missing furniture or color as much as they are missing strong edges. Doorways and windows may have very small casing, simple drywall returns, or trim that is so narrow it barely frames the opening, which can make those areas look flat, unfinished, or visually disconnected from the rest of the room.
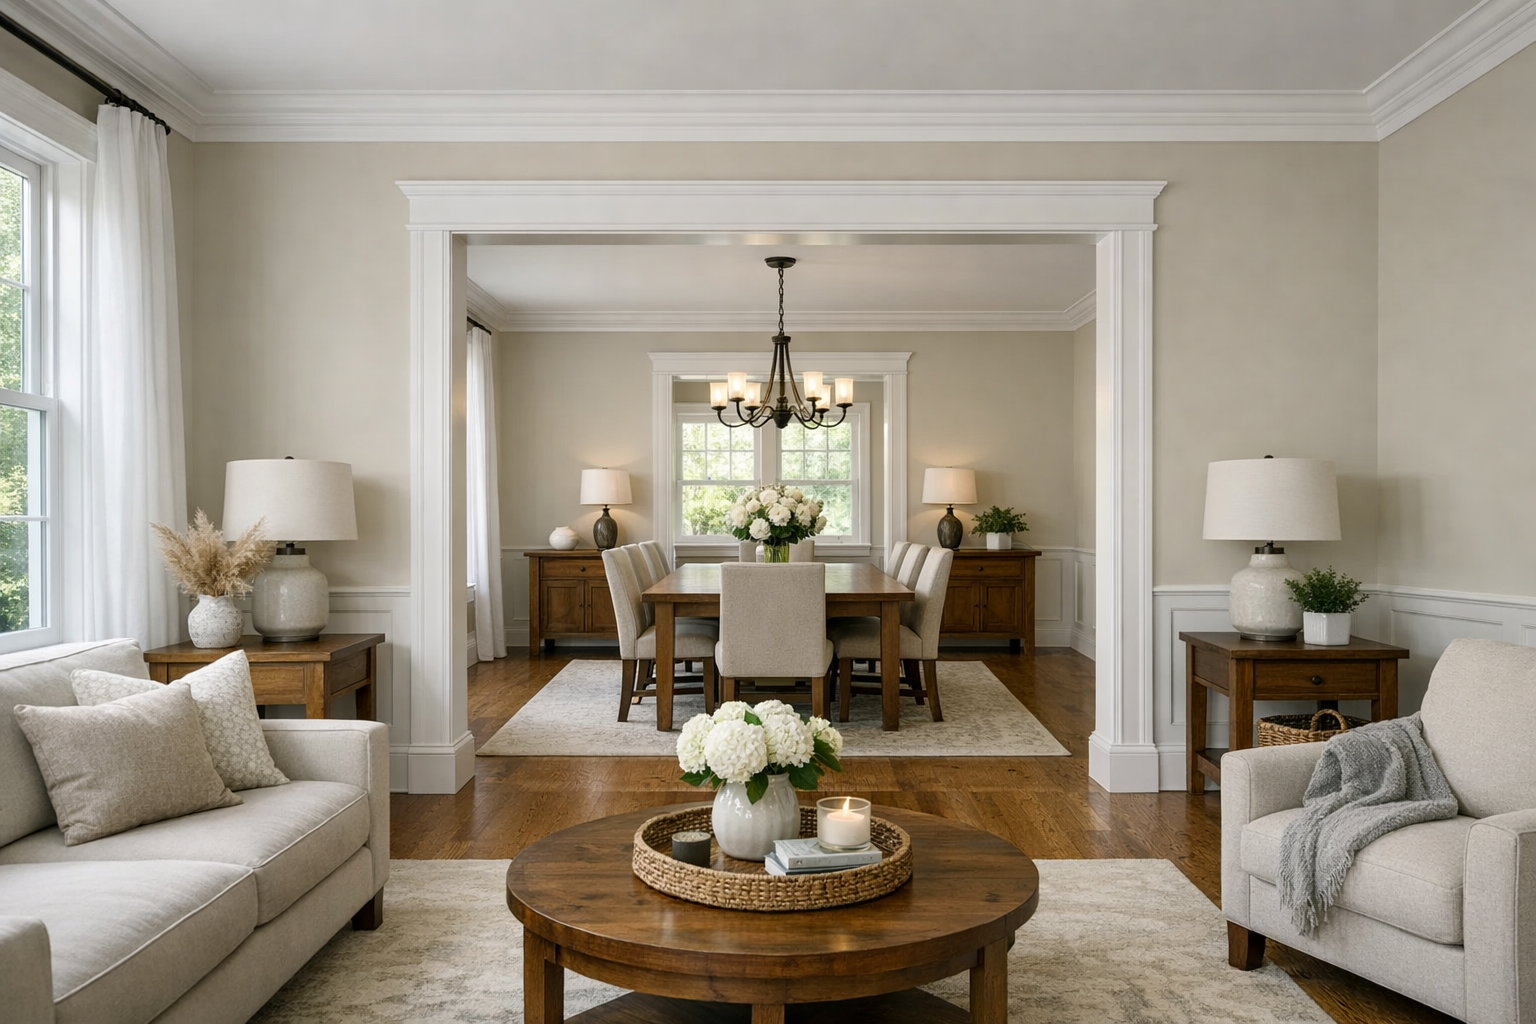
That is why a builder-grade trim upgrade can have such an outsized effect. Casing is interior trim, the finished border around doors, windows, and cased openings, so improving it targets one of the most repeated architectural details in the home. For Sarasota County homeowners who want a more finished, upper-mid look, custom trim upgrades can make a room feel more intentional without changing the doors, windows, flooring, or layout.
The difference comes from framing and proportion. Better-scaled casing gives each opening a clearer outline, helps windows and doors relate to nearby baseboards and ceiling height, and turns plain cutouts into architectural features. But casing is not a magic cover-up; it looks custom only when the scale fits the room, the reveals are consistent, the joints are clean, and the paint finish is smooth. When those details are handled well, the upgrade feels built into the home instead of added on later.
What Makes Basic Door and Window Casing Look Builder-Grade
The giveaway is usually not one single flaw; it is the way several small choices make the opening look under-scaled. Builder-grade door and window trim often reads as generic when the casing profile is too slight for the wall, the shape is so familiar that it disappears, or the edge of the opening does not have enough visual weight to feel intentionally designed.
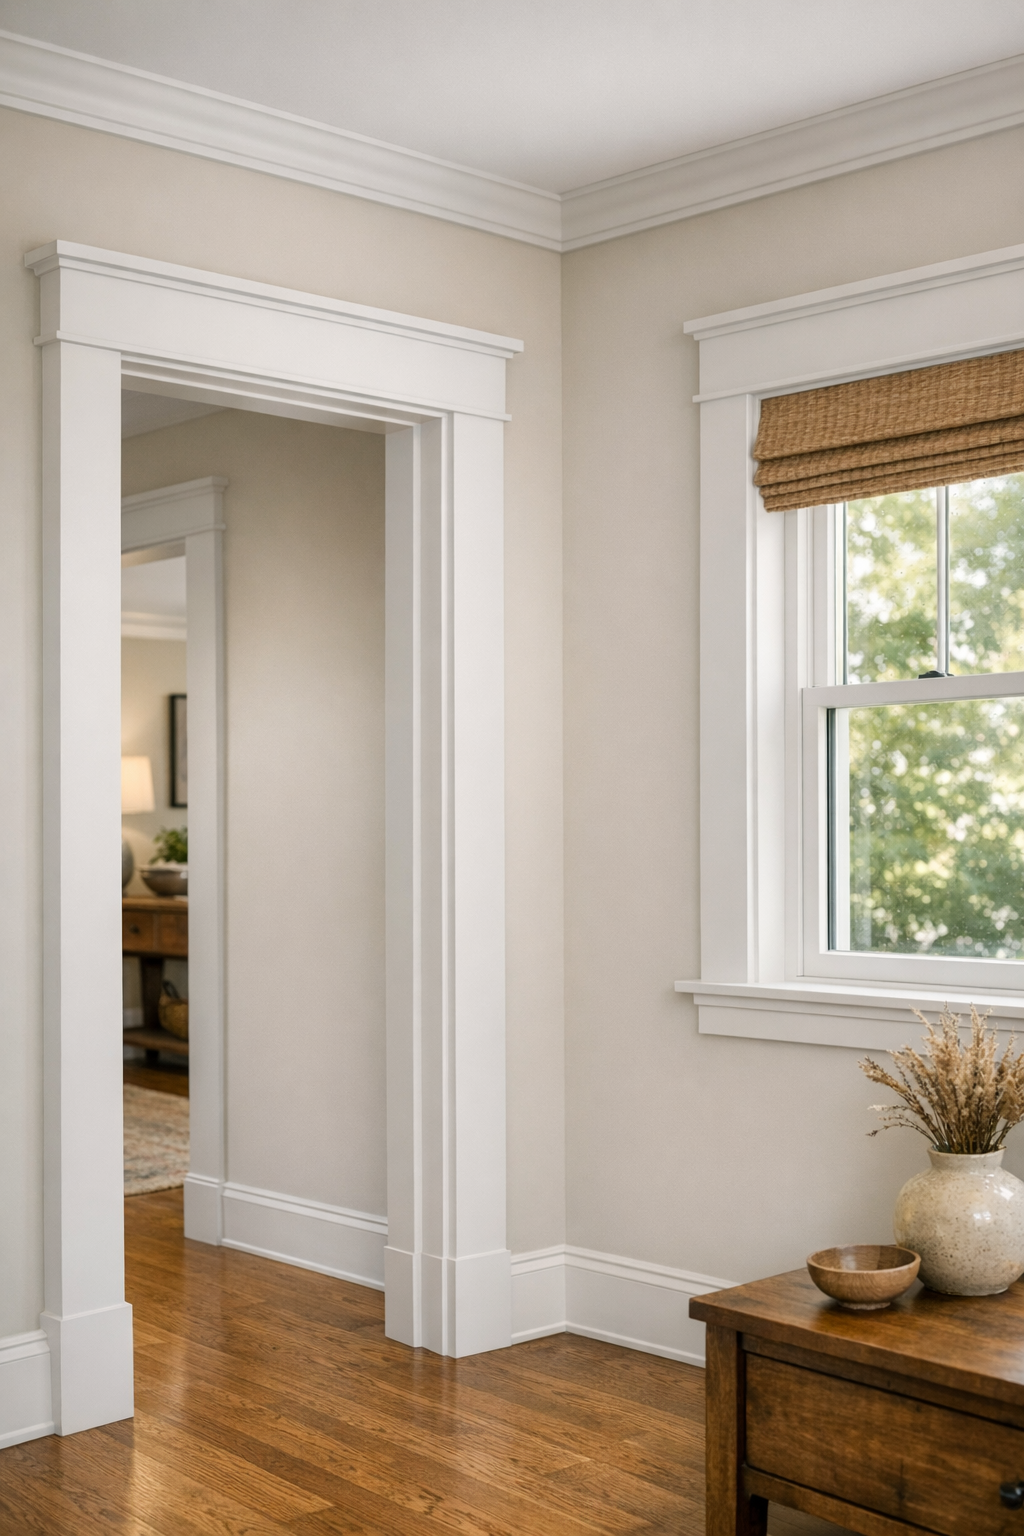
Scale is the first checkpoint. A casing profile is the visible shape and width of the trim, and it changes how strongly a door or window is framed. On taller walls, wide rooms, or larger openings, very slim casing can look like a thin outline instead of an architectural border. Wider or better-proportioned casing gives the opening more presence and helps it relate to the baseboards, wall height, and surrounding trim rather than floating on its own.
Finish quality is the second giveaway. Uneven reveals, heavy caulk lines, open miter joints, inconsistent casing widths, or paint that collects in corners can make even a decent profile look inexpensive. Reveals are the small, even margins between the edge of the door or window jamb and the casing; when they wander, the eye reads the work as rushed. Clean joints and smooth paint matter because casing sits at eye level and repeats throughout the house.
This is why more ornament is not always the answer. Simple paint-grade trim can look custom when the proportions are right, the lines are consistent, and the installation is crisp. The weak version is "plain because it was the default." The strong version is "simple because it fits the room." That distinction is what separates a basic casing swap from an upgrade that actually looks planned.
Casing Styles That Make a Home Feel More Custom
Once the room has enough trim presence to hold its own, the style choice decides the mood. The best casing direction is not always the fanciest one; it is the one that makes the doors, windows, baseboards, and wall height feel like they were designed together.
- Modern flat-stock casing: This uses simple rectangular boards with square edges and very little profile detail. Flat stock trim creates clean lines, which works well in transitional, contemporary, and coastal-leaning interiors where the goal is a crisp frame instead of decoration. It is a strong builder-grade trim upgrade because it replaces weak outlines with deliberate geometry. The weak version happens when the boards are too narrow, the reveals are inconsistent, or the baseboards still look much thinner than the new casing.
- Craftsman-style trim: Craftsman casing usually has wider side boards and a squared header above the opening, often with a slightly heavier top piece. It gives a door or window a grounded, handmade feel without becoming ornate. This style works especially well when a plain room needs more structure, or when interior door trim should feel substantial but still relaxed. It can look wrong if the header is oversized for the ceiling height or if only one opening gets the treatment while nearby openings stay thin and basic.
- Decorative profiles: These casings have curves, beads, coves, or stepped shapes that create softer shadow lines. They lean more traditional and can make a room feel more finished when they relate to existing baseboards, cabinet details, furniture style, or crown molding. Among common window trim ideas, this is the direction to choose when the home already has classic details. The risk is mixing a formal casing with very plain doors, ultra-simple baseboards, or minimalist furnishings, which can make the trim feel pasted on.
- Built-up casing with backband: Built-up trim layers more than one piece, often adding a backband around the outside edge of the casing. That extra layer creates depth and a stronger shadow line, so the opening feels more architectural. It can be especially effective around larger windows, cased openings, or main living areas where a single thin profile would disappear. The tradeoff is scale: if the build-up is too bulky for the room, it can overpower the opening instead of refining it.
- Traditional mitered casing: This is the familiar picture-frame approach, with angled corners meeting at the top. It can still look custom when the profile has the right width, the corners close cleanly, and the paint finish is smooth. It is a good fit when the homeowner wants a more familiar, less architectural change. The weak signal is sloppy miter joints or a profile so common and undersized that it recreates the builder-grade look the upgrade was meant to solve.
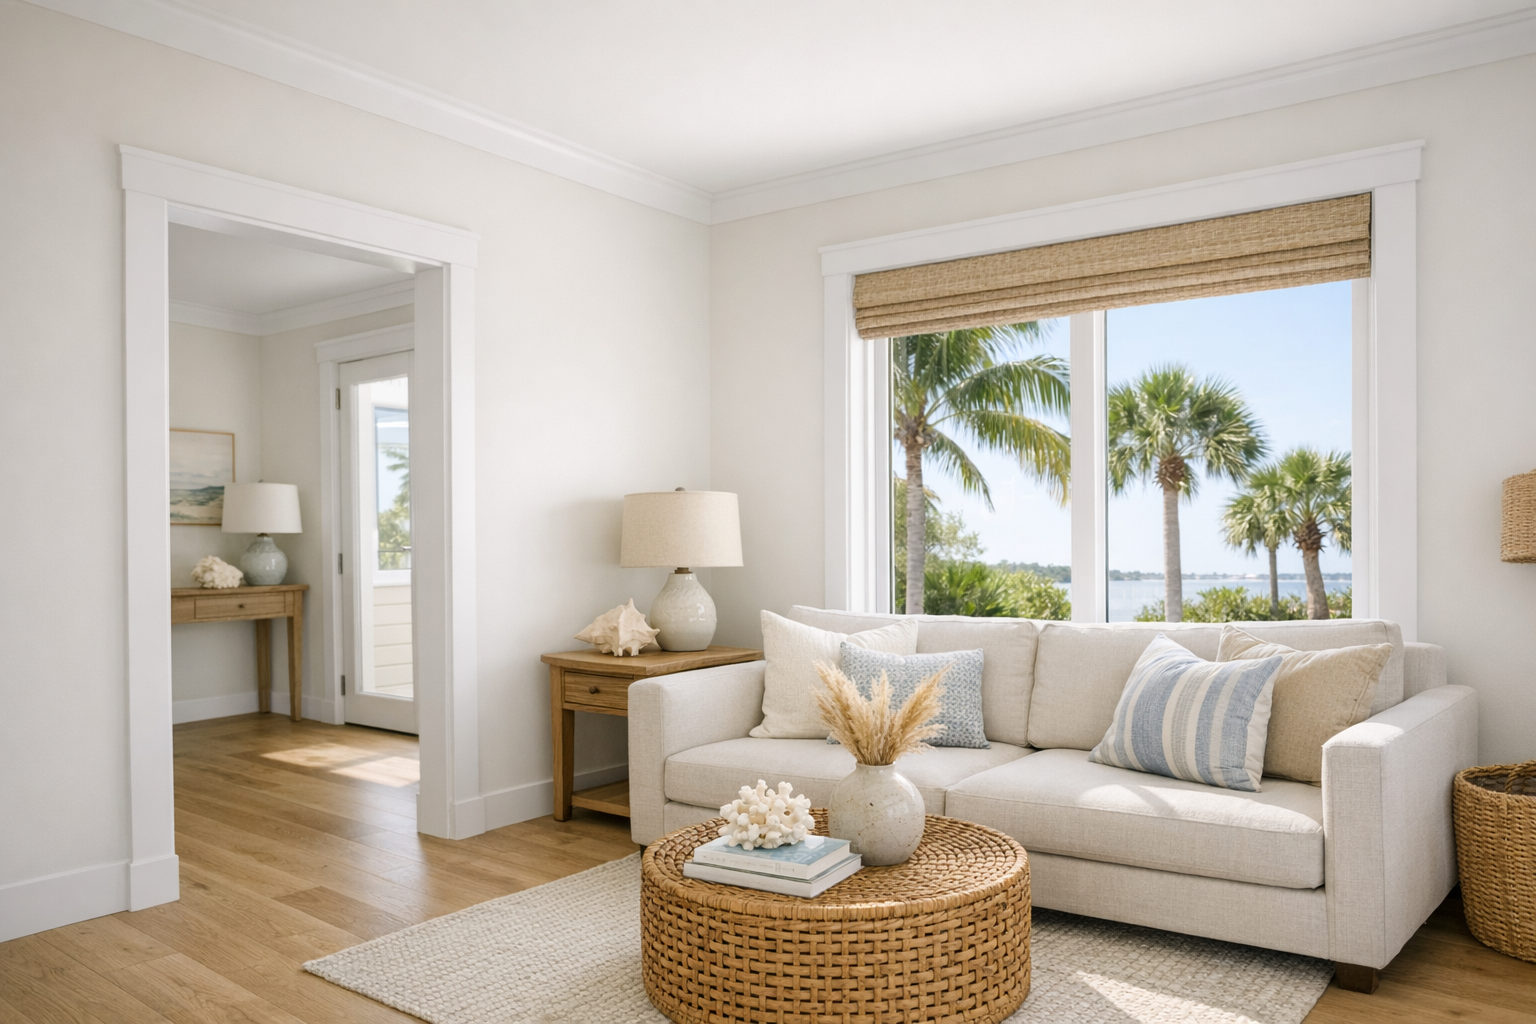
For Sarasota County homes, the most successful choice is usually the one that supports the home's existing direction instead of fighting it. A light, clean room may only need wider flat stock trim; a more traditional room may benefit from a shaped profile; a main living area may justify a built-up surround. The style matters, but the consistency from opening to opening is what makes the result feel intentional.
How Window Casing Upgrades Change a Room Without Replacing the Windows
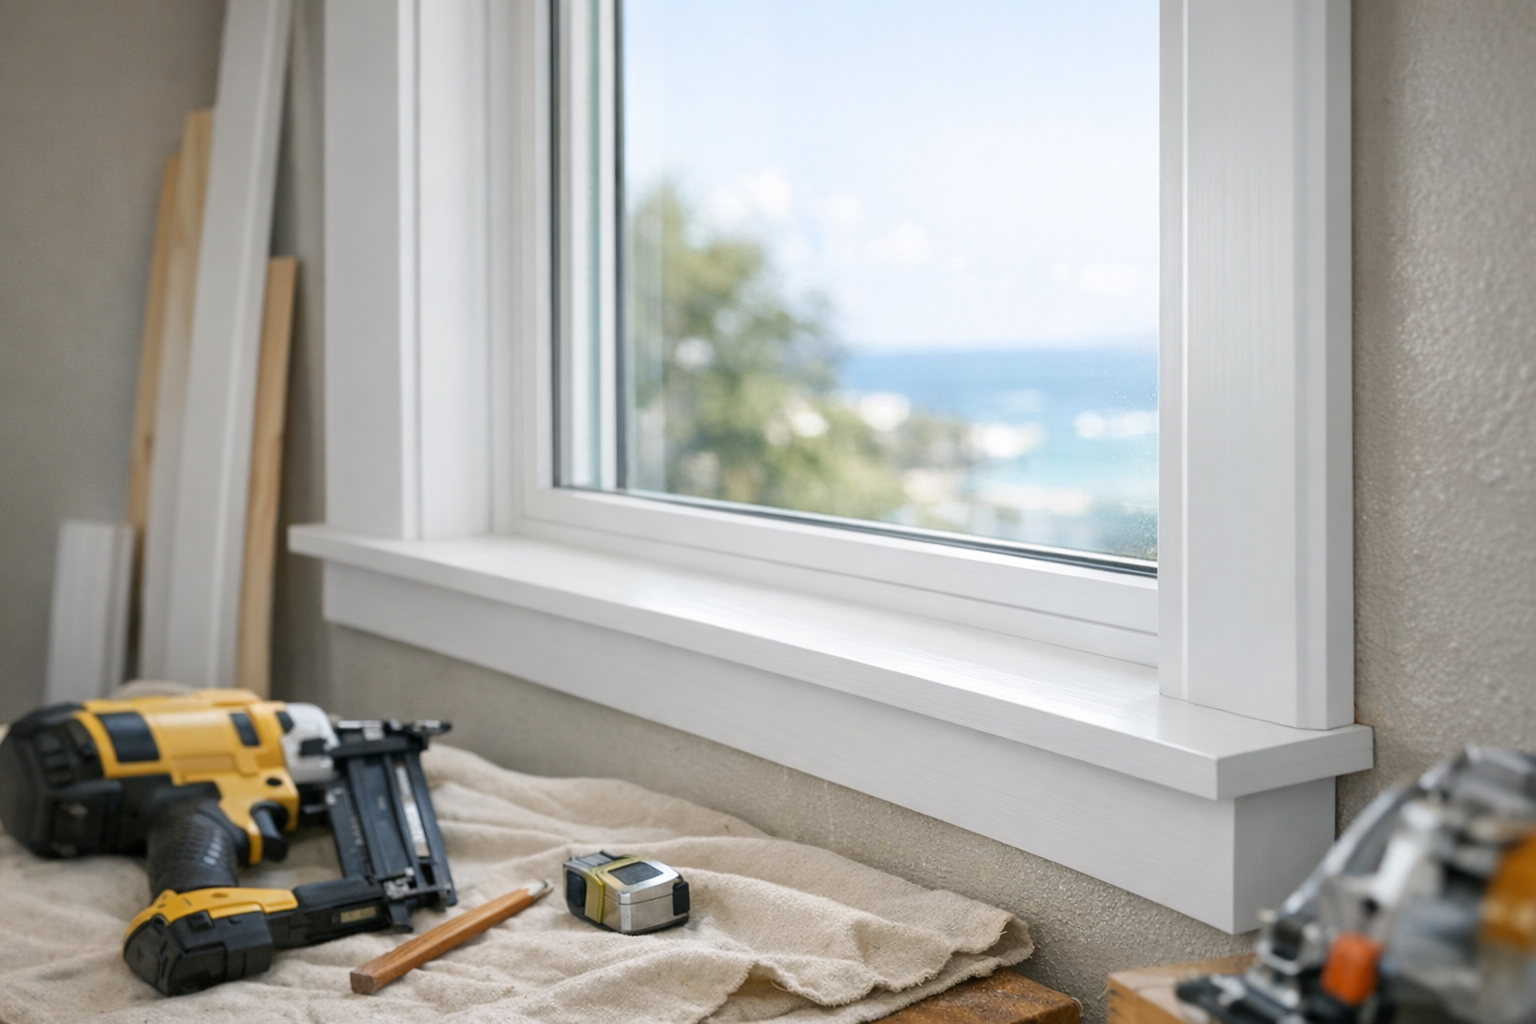
The window unit itself is not always the part making the room feel basic. In many cases, the glass, frame, and operation can stay as they are while the interior finish carpentry around the opening changes. This is where window casing installation is different from exterior window replacement, hurricane glass, or impact products: the project is about the inside trim package, not the window system.
A drywall return is the simplest treatment: the wall surface turns into the window opening with little or no wood frame around it. That can look clean in some modern homes, but in many builder-grade rooms it makes the window feel flat, especially on a large wall with light paint and minimal detail. A fully cased window adds a defined border, so the view, the natural light, and the wall composition feel more deliberately framed.
The two common directions create different moods. Picture-frame casing wraps all four sides of the window in a continuous frame, which gives a simple, tidy, more modern look. A stool and apron treatment adds a horizontal ledge at the bottom and a trim piece beneath it, giving the window more weight and a more traditional or Craftsman-leaning character. The takeaway: picture-frame casing tends to feel cleaner and quieter, while stool and apron trim makes the window feel more furniture-like and finished.
Depth matters, too. A deeper-looking surround, wider side casing, or a small layered edge can create shadow lines that make an existing window feel more substantial without changing the opening. If the goal is to upgrade basic window casing without making the room ornate, a simple flat-stock surround can be enough; if the room already has heavier baseboards or more traditional details, a stool and apron or built-up casing may feel more connected.
For Sarasota County homeowners, this can be a practical way to make newer interiors feel more complete without turning the project into a full remodel. The custom look comes from proportion, consistent reveals, tight joints, and smooth paint, not from pretending the windows are something they are not. If the window itself is damaged or poorly functioning, trim will not solve that; but when the unit is fine and the surround is the weak point, casing can change the room quickly and visibly.
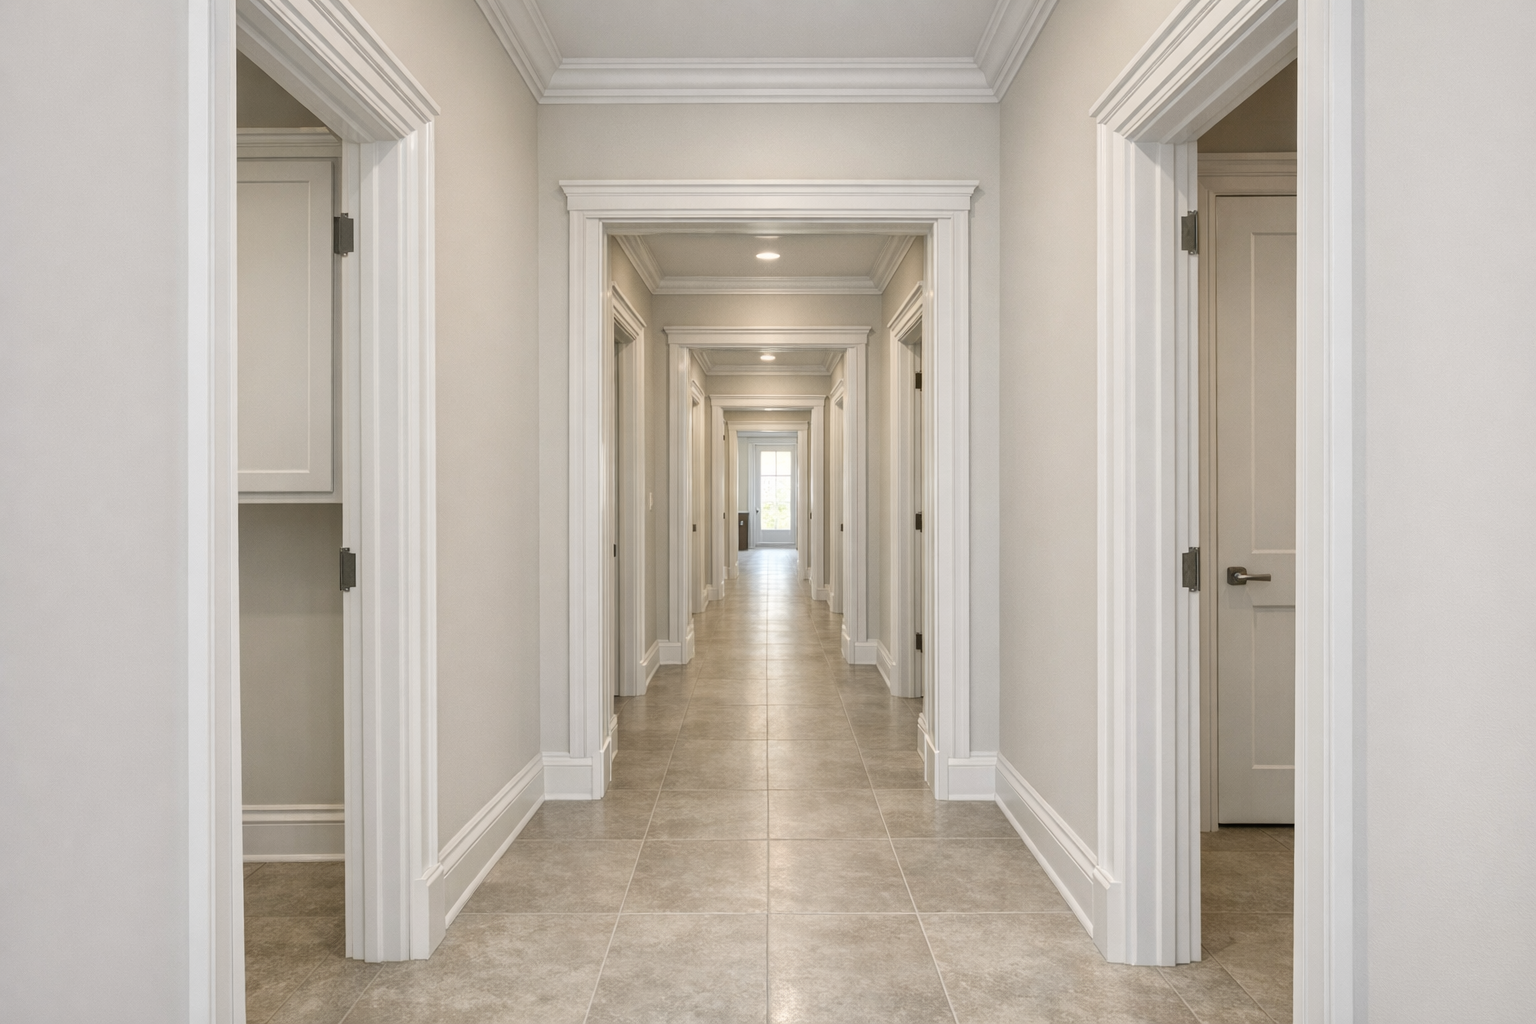
Why Interior Door Trim Has an Oversized Impact
Walk down a hallway and the door openings do most of the visual counting. Bedrooms, bathrooms, closets, laundry rooms, and cased pass-throughs repeat one after another, so interior door trim has a stronger cumulative effect than a single accent wall or one upgraded fixture. When those openings share a better scale and cleaner finish, the home starts to feel more planned from room to room.
Width is the simplest lever. Narrow casing can make a standard hollow-core or panel door feel like it was simply inserted into the drywall; wider casing gives the doorway a stronger frame and makes the transition between rooms feel more deliberate. A header treatment changes the mood even more: a simple flat header keeps the look clean and modern, while a Craftsman-style cap adds weight at the top so the doorway feels more architectural.
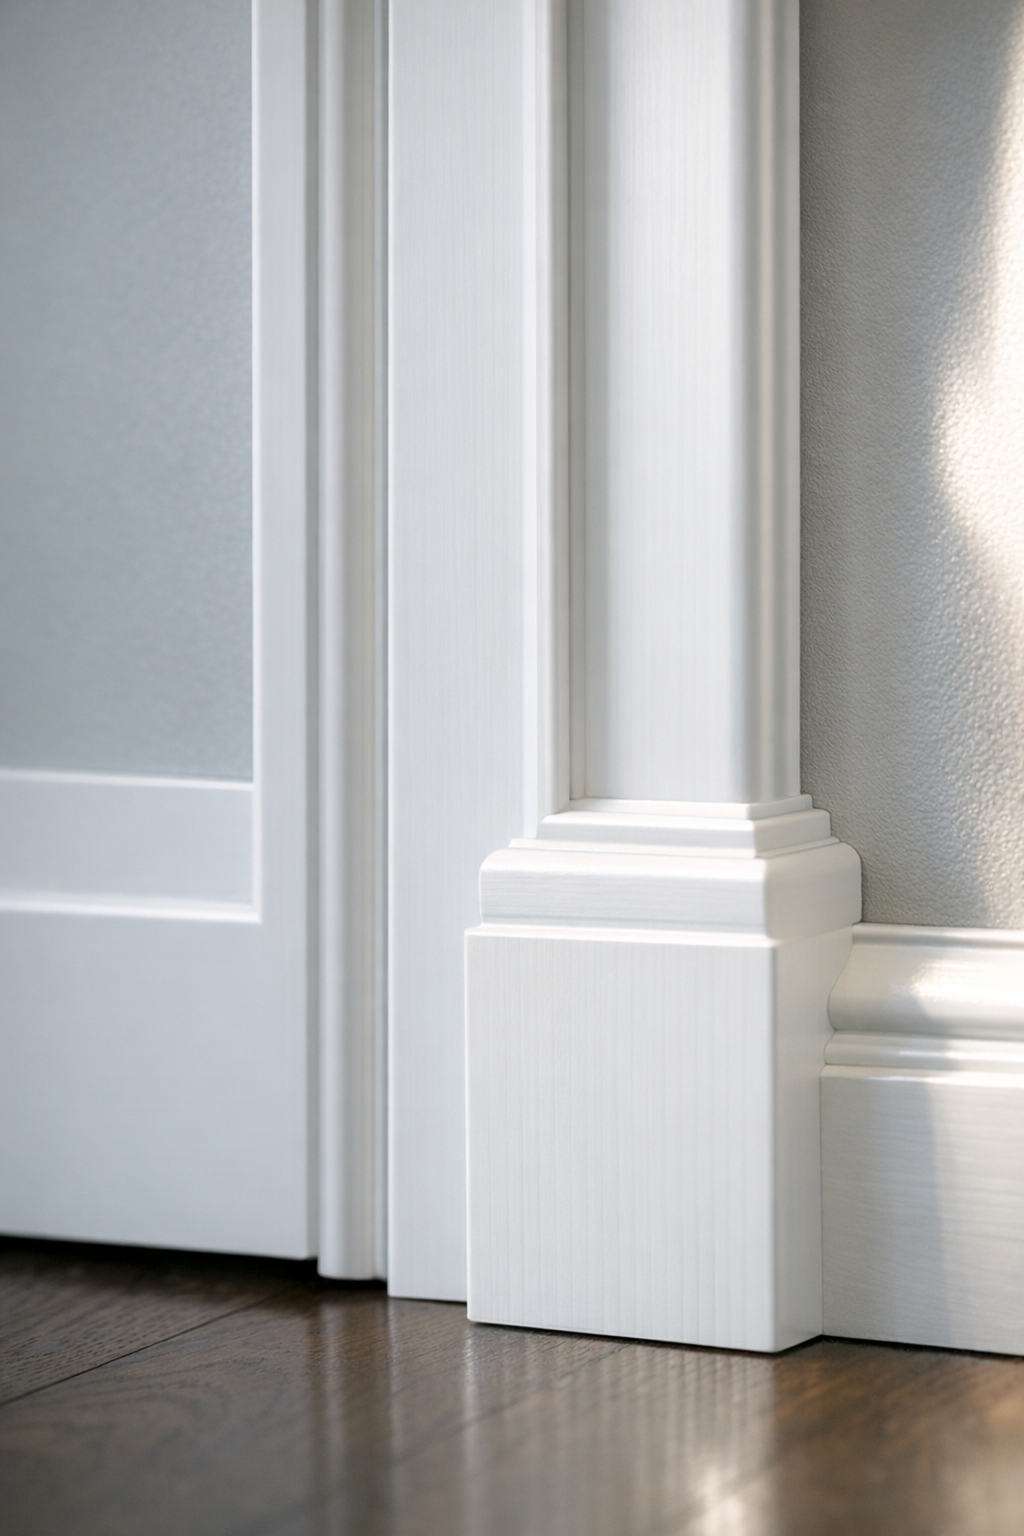
Small decorative pieces can help, but they need the right room. Plinth blocks are square blocks at the base of the casing, and rosettes are decorative blocks at the upper corners. They can add old-house character and make door casing installation look more detailed, but in a light coastal or transitional interior, too many blocks can feel busy or overly traditional.
Door and window trim also do not have to be identical to look coordinated. The safest approach is to repeat one or two cues: the same paint color, related widths, similar edge profiles, or a shared flat-stock language. That lets you upgrade basic door casing in hallways and bedrooms while giving larger windows or main living areas a slightly more substantial treatment without making the house feel mismatched.
The Details That Separate Custom-Looking Trim From Added-On Trim
The moment trim starts wrapping multiple openings, the small measurements become visible. A strong casing profile can still look "stuck on" if the reveal is uneven, the joints are sloppy, or the new width fights the baseboards. The goal is for the casing to look like part of the room's original finish carpentry package, not a decorative strip added after the fact.
Scale is the first filter. Casing should feel substantial enough to frame the door or window, but not so heavy that it crowds the glass, shrinks the opening, or looks top-heavy against a lower ceiling. A good signal is balance: the trim has enough presence to relate to the baseboard and wall height, while the door or window still feels like the main feature.
Reveals are the narrow, consistent margins between the casing and the inside edge of the jamb. Even reveals make the opening look controlled and deliberate; wandering reveals make even expensive trim look rushed. The same idea applies to joints: tight miters suit shaped profiles, while clean butt joints suit flat-stock or Craftsman-style trim. The joint style can be simple, but it should look intentional.
Paint is another separator. Smooth caulk lines, crisp edges, and an even satin or semi-gloss finish help the casing read as one clean architectural element. Thick paint buildup, lumpy caulk, or visible nail fills interrupt the shadow lines that make upgraded trim feel sharp in the first place.
Material selection matters because it affects the final painted surface and the way edges hold detail. If you are comparing MDF trim, finger-jointed pine, or other paint-grade options, the practical takeaway is to choose material that suits the room conditions, the desired profile, and the finish level you expect. A builder-grade trim upgrade looks custom only when the profile, wall conditions, baseboards, and paint finish all agree with each other.
Trim Styles That Work Well in Sarasota County Homes
In Sarasota County finish carpentry, the best-looking custom trim upgrades often lean lighter and cleaner rather than heavily ornate. Many coastal, transitional, and newer builder-grade interiors already have light walls, tile floors, tall ceilings, and open sightlines, so casing with clean lines can frame the room without making it feel busy.
Flat-stock casing is the simplest fit for that look: it uses straight, squared boards to create a crisp border around doors and windows. Simplified Craftsman casing adds a slightly stronger top header, which gives openings more structure without turning traditional. By contrast, very layered or carved profiles create more shadow and formality, so they work best when the rest of the house has enough detail to support them.
Local conditions also affect the choices that feel polished. Bright rooms make uneven joints, waviness, and paint flaws easier to notice, so smooth surfaces and clean paint matter. In bathrooms, laundry rooms, and near exterior entries, room conditions can influence material and paint selection. In open plans with tile running through several spaces, consistent casing proportions help the trim read as one connected finish package instead of separate add-ons.
How to Plan a Casing Upgrade Without Remodeling the Whole House
A casing project does not have to touch every room to feel worthwhile. The best starting point is usually the area where openings are seen together: the main living space, entry hall, kitchen-to-dining sightline, or a hallway with several bedroom and closet doors. Upgrading those repeated frames first gives the home a more coordinated finish without turning the project into a whole-house remodel.
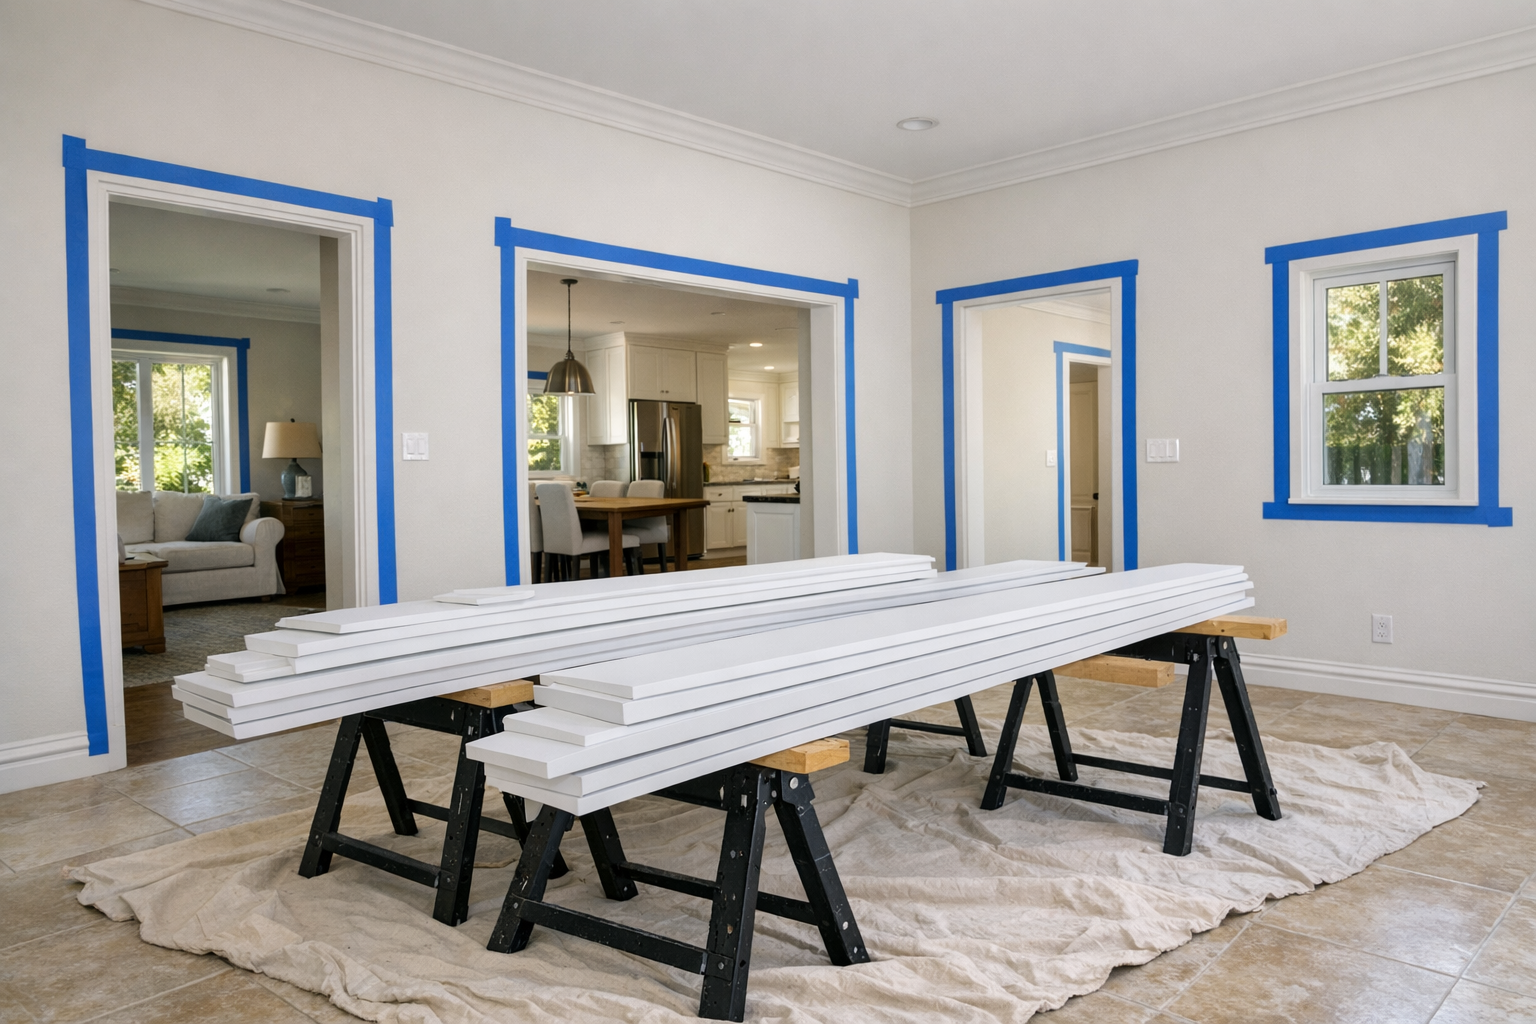
If you are planning in phases, think in "visual zones" instead of single openings. One upgraded window in a room full of untouched doors can look isolated, while a complete family room, primary suite, or hallway can look intentional. Public areas create the biggest first impression; a primary suite makes sense if your goal is a more finished private retreat; and high-visibility windows are good candidates when they anchor a room or sit in a long sightline.
Baseboards can often stay when their height, thickness, and edge profile feel related to the new casing. For example, a clean square casing can pair well with a simple square base if the proportions are close and the corner transitions are tidy. They become harder to keep when the existing base is very thin, visibly worn, inconsistent from room to room, or shaped in a way that fights the new door and window trim.
Before committing to custom trim upgrades throughout the home, it helps to review a real sample or small mockup on an actual opening. A profile that looks subtle in a catalog can feel too wide beside a narrow door, and a header that looks substantial in one room may feel heavy under a lower ceiling. Seeing the width, reveal, paint color, and nearby baseboards together is the quickest way to catch a mismatch.
That is the practical strength of a builder-grade trim upgrade: it is focused, visible, and design-driven. When the scope is planned by sightline, the trim relates to the existing room, and the workmanship is clean, new casing can make a basic home feel more finished without asking you to remodel everything around it.
Small Trim Changes Can Make a Builder-Grade Home Feel Designed
The finishing test is whether your eye stops noticing the individual boards and starts reading the openings as part of the room. Repetition is what creates that effect: consistent reveals, related casing widths, a coordinated profile, and a clean paint finish make doors and windows feel planned instead of patched in. If one opening has crisp flat stock, the next has thin builder trim, and the window nearby has a different edge altogether, the room can still feel pieced together.
That is the real value of a builder-grade trim upgrade. It can make a home feel more custom without replacing the doors, changing the windows, or remodeling entire rooms, but only when the choices are treated as a finish package. Profile sets the style, scale controls whether the trim feels strong enough for the wall, paint finish determines how polished the surface looks, and installation quality decides whether the upgrade reads as built-in or merely attached.
For Sarasota County finish carpentry projects, the smartest next step is to start with the most visible openings and build a cohesive plan before anything is installed. Prioritize the entry sightline, main living areas, hallway runs, or windows that anchor important rooms. If you want custom trim upgrades to look seamless, a finish carpenter can help align the casing, baseboards, reveals, and paint approach so the whole home feels more intentionally designed.