
Interior trim installation is one of the last visible layers of a room, so small prep details can have an outsized effect on how smoothly the day goes. Before the crew arrives, the most helpful thing a homeowner can do is make the work areas easy to access and make the big decisions clear: which rooms are included, what trim is being installed, what finish is expected, and who is handling prep and touch-up.
That kind of finish carpentry prep reduces the chances of avoidable delays, rework, and misunderstandings. A strong setup looks like cleared walls, known finish choices, agreed responsibilities, and a homeowner who can answer project questions without turning every detail into a last-minute decision. A weak setup is the opposite: furniture in the way, uncertain paint plans, unclear old-trim removal, or assumptions about who will fill nail holes and handle touch-ups.
The goal is not to make the project perfectly dust-free, silent, or invisible while it is happening. Trim work still involves tools, movement through rooms, cutting, fastening, caulking, and final touch-up. Your role is preparation and communication; the installer's role is layout, fitting, fastening, scribing, and professional finish quality. When those roles are clear before installation day, it is much easier to prepare for trim installation without stress.
Confirm the Scope, Schedule, and Finish Decisions First
Start with the written plan, not the tool setup. A useful trim installation preparation conversation should answer the basic "what, where, who, and when" questions before trim installers arrive: which rooms are included, which openings or walls are excluded, what trim profile is being used, whether existing trim is being removed, and who is responsible for each step before and after installation.

- Confirm the room-by-room scope. "Install new baseboards downstairs" is weaker than "install 5 1/4-inch primed baseboard in the entry, hallway, living room, dining room, and powder room, excluding closets." A clear room list prevents assumptions about closets, stair landings, pantry openings, or small transition areas.
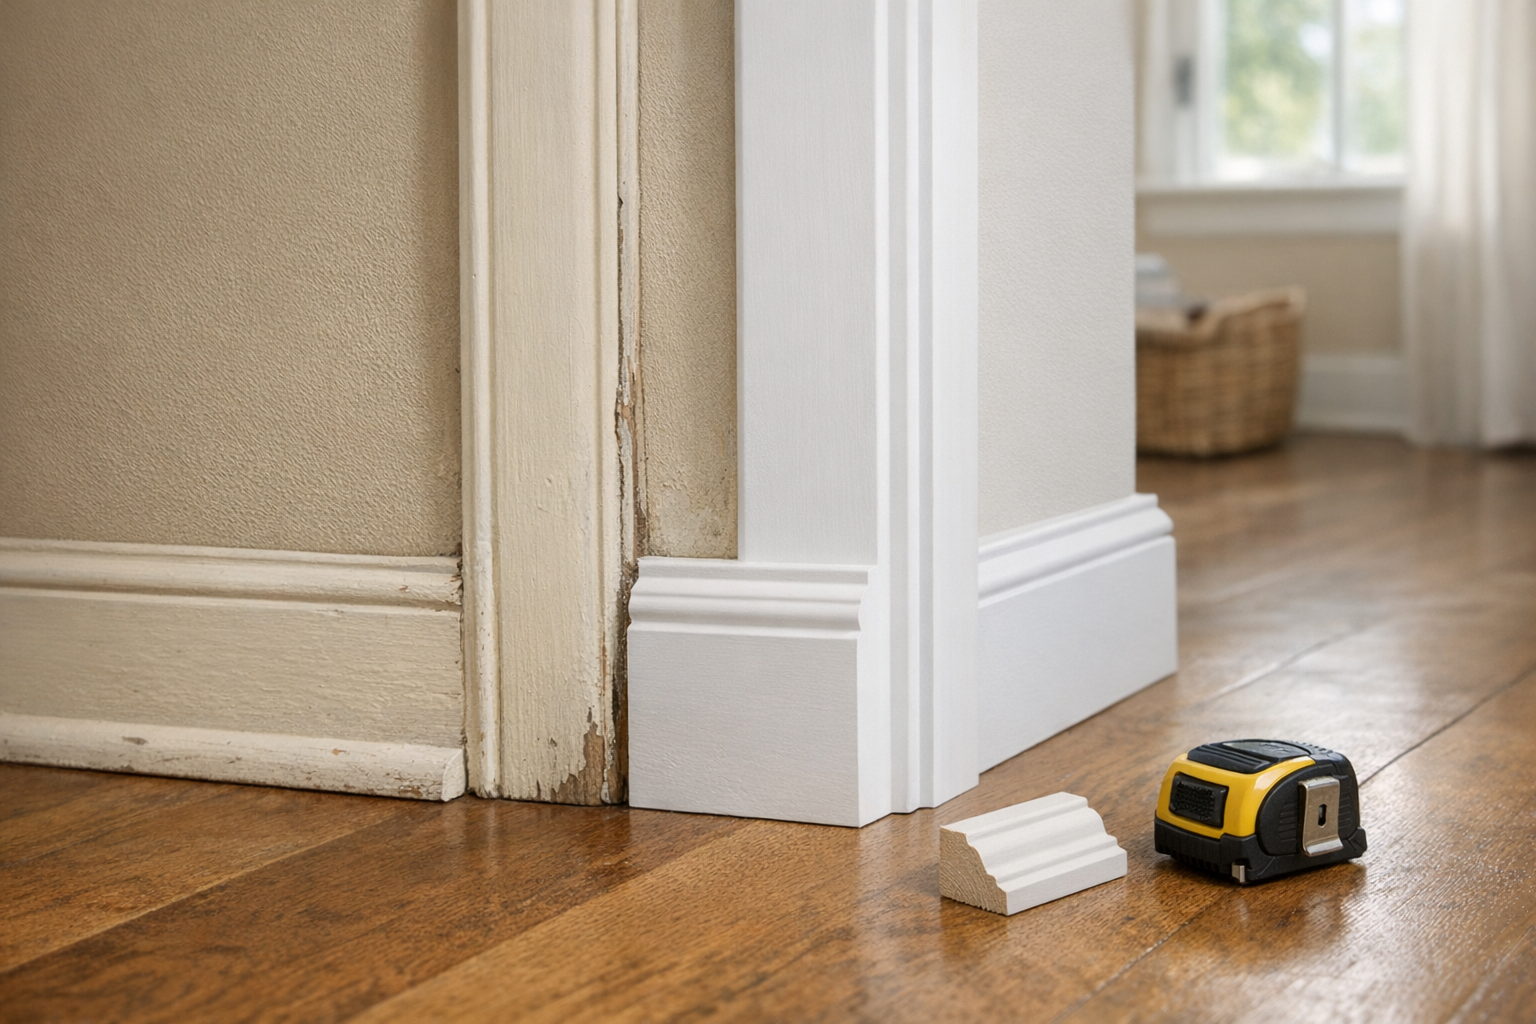
- Name the trim type. Baseboards cover the wall-to-floor joint; crown moulding finishes the wall-to-ceiling line; casing frames doors and windows; chair rail runs horizontally on the wall; wainscoting adds panel detail; shoe moulding and quarter round cover small gaps at the floor. These are not interchangeable tasks, so each one changes the access needed, the cutting work, and the finish expectations.
- Settle the finish plan. Decide whether the trim will be painted or stained, whether it arrives pre-primed or unfinished, and whether painting happens before installation, after installation, or in stages. Paint-grade trim usually allows caulked seams and filled nail holes; stain-grade trim tends to make color matching and clean joints more visible.
- Clarify old trim removal. Removal can include pulling baseboards, scraping leftover caulk, dealing with wall scuffs, and disposing of debris. If that work is not in the scope, the installer may arrive expecting open walls while the homeowner expects demolition to be included.
- Assign finish responsibilities. Ask who fills nail holes, caulks seams, sands filled spots, paints touch-ups, and handles final cleanup. These small tasks affect how "finished" the room looks at the end of the day.
- Confirm materials and logistics. Know who supplies the trim, when it will be delivered, whether it needs time on site before installation, and where it can be staged without blocking daily life.
- Lock in access details. Share the arrival window, working hours, parking location, gate or elevator access, and restroom availability. This keeps the first hour focused on setup instead of avoidable phone calls.
As you prepare for trim installation, treat these details as alignment points rather than formalities. The goal is a shared expectation of what will be installed, what will be finished, what will be protected, and what still needs attention after the carpenter leaves.
Clear Furniture, Wall Space, and Walking Paths
Once the scope is clear, walk each room as if someone needs to carry long trim pieces, set up tools, kneel at the wall, and move without squeezing past furniture. For home prep before trim installation, a good working target is to move furniture at least 3 to 4 feet away from the walls when the room allows; if space is tight, ask which pieces must move first and which can stay centered in the room.

- For baseboards, clear the full perimeter. Baseboard installation prep is all about floor-line access: move sofas, beds, bookcases, toy bins, plant stands, pet bowls, and storage baskets away from the walls. Remove small rugs and expose inside corners, outside corners, and the areas behind doors so the installer can measure, cut, fasten, and finish without working around hidden obstructions.
- For door and window casing, clear the openings. Casing work needs space around the sides and top of each door or window, not just along the floor. Move entry tables, nightstands, chairs, hampers, and décor away from openings. If curtains, blinds, tiebacks, or rods block the trim area, take them down before the crew arrives or ask whether removal is included.
- For crown moulding, think high and wide. Crown work happens at the wall-to-ceiling line, so tall furniture matters more than low furniture. Move armoires, tall shelving, leaning mirrors, floor lamps, and high wall décor that could block ladder placement. Clear items from upper shelves because ladder movement and long trim lengths can make tight upper corners difficult to reach.
- Protect fragile and loose items by removing them yourself. Take down framed photos, lightweight wall art, clocks, breakable shelf décor, candles, vases, and items sitting on window sills. This is especially important near doorways and hallways where long boards may turn corners.
- Keep walking paths open. Clear a route from the entry door to each work area and to the material staging spot. A strong setup lets the crew move trim without stepping over shoes, bags, toys, laundry baskets, or small rugs.
If you are trying to prepare a room for baseboard installation but cannot move a heavy piece alone, flag it before installation day. The key distinction is responsibility: homeowners usually handle personal belongings and fragile items, while furniture moving should be discussed in advance so no one is surprised when the crew arrives.
Plan Floor and Surface Protection Before Work Starts
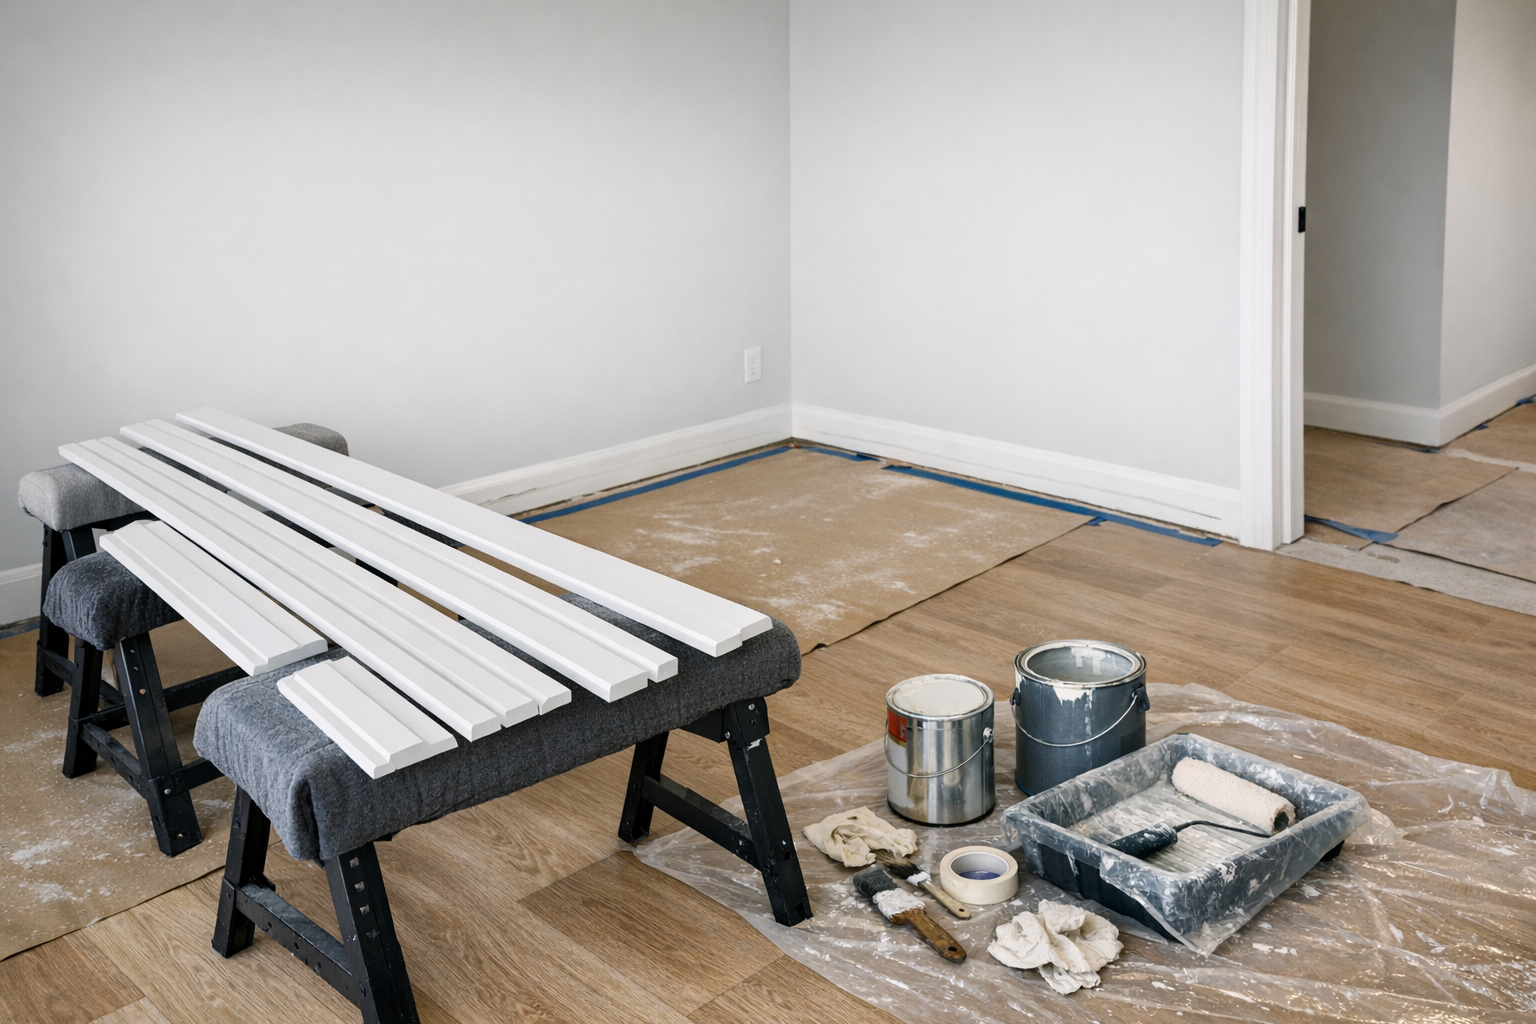
Make surface protection part of the same responsibility conversation as furniture moving and touch-ups. Professional crews often bring their own floor protection, but you should know what is included, which rooms and paths will be covered, and whether you need to handle any extra protection before installation day.

- Hardwood floors: Ask for a protection plan that accounts for ladders, tool bags, trim boards, compressor hoses, sawdust, and repeated foot traffic. Drop cloths are easy to move, paper-style coverings can protect longer runs, and heavier board-style protection may be useful in main work zones. The takeaway: hardwood floors need protection that stays in place and does not trap grit underneath.
- Tile floors: Tile is hard, but the surface can still be affected by dropped tools, gritty dust, or movement across grout lines. A good plan may use runners or board-style protection in traffic paths and work areas. The takeaway: do not assume tile needs no protection just because it is durable.
- Carpet and stairs: Carpet can hold sawdust and small debris, while stairs add slipping and movement concerns. Ask whether the crew will use runners, drop cloths, or another temporary covering that can be secured without damaging the surface. The takeaway: carpet protection is as much about cleanup and traction as it is about marks.
- Finished walls, cabinetry, and adjacent surfaces: Trim pieces are long, corners are tight, and work often happens close to built-ins, painted walls, countertops, and cabinet faces. Remove small items from nearby surfaces and point out freshly painted, delicate, or high-value areas before work begins. Painter's tape, plastic sheeting, or light masking may help in some spots, but tape can be a poor choice on delicate or newly finished surfaces.
Before the crew arrives, ask three simple questions: who provides the protection materials, where cutting will happen, and how dusty cuts will be managed. Some projects are cut outside or in a garage; others need a controlled cutting area inside because of weather, access, or room layout. This is a planning detail, not a promise that the project will create zero dust or zero marks.
As you prepare for trim installation, take photos of existing floor scratches, wall dings, cabinet marks, or fragile finishes in the work areas. That gives everyone a clear starting point and keeps the conversation focused if something needs attention after the work is done.
Coordinate Paint, Flooring, and Other Trades in the Right Order
Sequencing is one of the easiest places for small misunderstandings to turn into rework. Before installation day, make a simple "before, during, after" list for paint, flooring, and other trades so everyone knows what surface should be finished, what will be covered by trim, and what will still need touch-up.
- Finished flooring and baseboards: In many projects, finished flooring is in place before baseboards are installed so the baseboard can sit neatly above the floor surface. Shoe moulding or quarter round is a smaller trim piece that may be added afterward at the floor line to cover small gaps or flooring expansion space. The practical takeaway for baseboard installation prep: know whether the main baseboard, shoe moulding, or both are included in the job.
- Wall paint: Walls are often painted before trim goes in because it is easier to roll broad wall areas without cutting around fresh trim. That does not mean the paint work is completely finished. Caulk lines, nail holes, joints, and small scuffs commonly need final attention after the trim is installed, so clarify who handles those final touch-ups.
- Pre-painted or pre-primed trim: Painting or priming trim before installation can speed up coverage because boards can be coated flat and away from finished walls. The tradeoff is that cut ends, nail holes, seams, caulk lines, and outside corners may still need finishing after installation. Painting after installation takes longer in the room but can create a more continuous final coat across joints and touch-up areas.
- Crown moulding and ceiling paint: Crown touches both the wall and ceiling, so crown moulding installation prep should include a color plan for both surfaces. If the ceiling and walls are different colors, decide whether the crown will match the trim, the ceiling, or another finish, and expect careful cutting-in or touch-up where those planes meet.
- Door and window casing: Casing frames openings, so it often intersects with painted walls, jambs, hardware, window treatments, and sometimes tile or backsplash edges. Before work starts, identify anything nearby that still needs painting, repair, or removal so the installer is not trimming around a surface that another trade will change later.
A good sequencing conversation is not about finding one perfect order for every house. It is about assigning responsibility: which trade finishes first, which surfaces need protection, and who comes back for caulk, nail-hole filling, paint, and final touch-ups.
Use the Right Prep Checklist for Each Type of Trim
Different trim locations create different bottlenecks, so use the scope you already confirmed to make a smaller checklist for each room. This helps you prepare for trim installation without treating a floor-level baseboard job the same as work near ceilings, openings, or detailed wall panels.
- Baseboards: These run along the bottom of the wall, so the key prep area is the floor edge. Move bins, shoes, curtains, toys, floor lamps, and small furniture away from the perimeter. Confirm whether existing baseboards are being removed, whether flooring is already finished, and whether shoe moulding or quarter round is part of the scope.
- Crown moulding: This sits where the wall meets the ceiling, so the crew needs upper-wall and ladder access. Move tall bookcases, armoires, plants, and artwork that crowd corners or ceiling lines. Also point out ceiling texture, low beams, vents, or uneven areas that may affect touch-up expectations.
- Door and window casing: Casing frames openings, so clear the swing area around doors and remove curtains, blinds, rods, or nearby decor that blocks window casing. Make sure the door or window units are installed and accessible before trim day so the carpenter is not working around an unfinished opening.
- Chair rail or wainscoting: These details cover visible wall sections, not just edges. Remove wall decor, mirrors, leaning furniture, and anything mounted at the planned trim height. If switch plates, thermostats, sconces, or wall-mounted furniture are in the way, ask which items should be removed before the crew arrives.
- Larger finish carpentry work: Built-ins, feature walls, mantels, and multi-piece trim packages usually need more staging space than simple linear trim. Clear nearby shelves and surfaces, protect adjacent finishes, and confirm where materials can be stored so the work area does not become crowded before layout begins.
Plan for Pets, Children, Noise, Dust, and Room Access
Household logistics deserve the same before-the-crew-arrives conversation as finish choices and touch-ups. When you are preparing for interior trim installation, decide where people, animals, tools, and materials will be during the work, not after the doorbell rings.

- Choose a pet plan: Use a closed room away from the work zone, a crate, daycare, or an off-site stay if possible. Pets can be startled by nailers, saws, compressors, ladders, open doors, adhesives, caulk, sharp trim ends, and loose material on the floor, so "they'll just stay nearby" is usually a weak plan.
- Set a kid-free work zone: Children should not have access to rooms where trim is being cut, fastened, glued, caulked, or staged. A good signal is a physical boundary, a closed door, baby gate outside the work area, or another adult keeping them in a separate part of the home.
- Expect noise: Interior trim work can involve saw cuts, air compressors, nailers, sanding, and repeated movement through hallways. If someone works from home, naps during the day, or is sensitive to sudden sounds, plan a quieter room, a different schedule, or time away during the loudest parts.
- Expect some dust: Cutting, sanding, and old trim removal can create dust even when containment and cleanup are used. Ask where cutting will happen and keep nearby doors closed, but do not plan on a completely dust-free day.
- Limit room access: Treat active work rooms as temporarily unavailable. If you need medications, work supplies, clothes, chargers, pet food, or school items, pull them out before the crew starts so no one has to step through tools or unfinished trim to retrieve them.
Do a Quick Walkthrough on Installation Day
When the lead installer arrives, start at the first doorway, stair run, or wall where work is supposed to begin. Point to the exact trim areas in the plan, the nearby surfaces that need extra care, and anything still in the way so the crew has a shared visual reference before tools and materials come inside.

- Confirm the room scope: Point to each wall, doorway, window, stair area, or ceiling line included in the work. Also name the areas that are not part of the job so no one has to guess from memory.
- Review remaining obstacles: If a sofa, bed, appliance, bookcase, or piano is still in the way, decide before work starts whether the homeowner, installer, or a separate mover is handling it.
- Agree on staging and cutting locations: Show where trim, tools, and supplies can be placed, and ask where cutting will happen. A good staging spot is accessible but not blocking main walkways, finished surfaces, or rooms the household still needs to use.
- Walk the protection plan: Identify the floors, stairs, cabinets, countertops, and finished walls that need extra care. This is also the time to point out pre-existing scratches, soft flooring, freshly painted areas, or delicate surfaces.
- Set access expectations: Confirm parking, entry doors, restroom access if offered, gate codes, and which doors should stay closed for pets, children, or dust control.
Also ask what to expect on trim installation day once the first pieces are in place: whether old trim is being hauled away or stacked for disposal, what daily cleanup includes, and how caulking, nail-hole filling, paint touch-ups, and the final punch list will be communicated. Interior trim installation often has visible finishing steps after the carpentry itself, so it helps to know which items are part of the install and which belong to the painter or homeowner.
Final recap: To prepare for trim installation, clear the work areas, protect finished surfaces, coordinate paint and flooring timing, secure pets and children, confirm access and staging, and speak up about fragile areas or special concerns before the crew starts.